I have a 4×8′ tabletop height raised garden bed and I love it. I use the square foot gardening method to get the maximum amount of plants to grow. Every year I get a little bit braver to grow more things. Some years have been great, some years have been epic fails. 😉
One downfall of having a tall raised bed is that you can’t really grow things horizontally if you want to use the square foot gardening method. And they tend to grow and fall off the side and break (ask me how I know; case in point for an epic fail). As far as for growing things vertically, I do have a cloth-type trellis I use for tomatoes, but for heavier items like squash, it just isn’t going to hold.
A New Idea
So, needless to say I was excited when recently I saw an idea in a magazine for a budget-friendly sturdy arched trellis. It would enable me to grow things vertically and save space! I was immediately hooked and did research into where I could buy the materials. Then I coerced my husband into helping me. So basically the rest of this newsletter if I say “we” was mostly my husband (and me “helping”, ha!). If you want to skip the details to just see the pictures, scroll to the bottom for a slideshow.
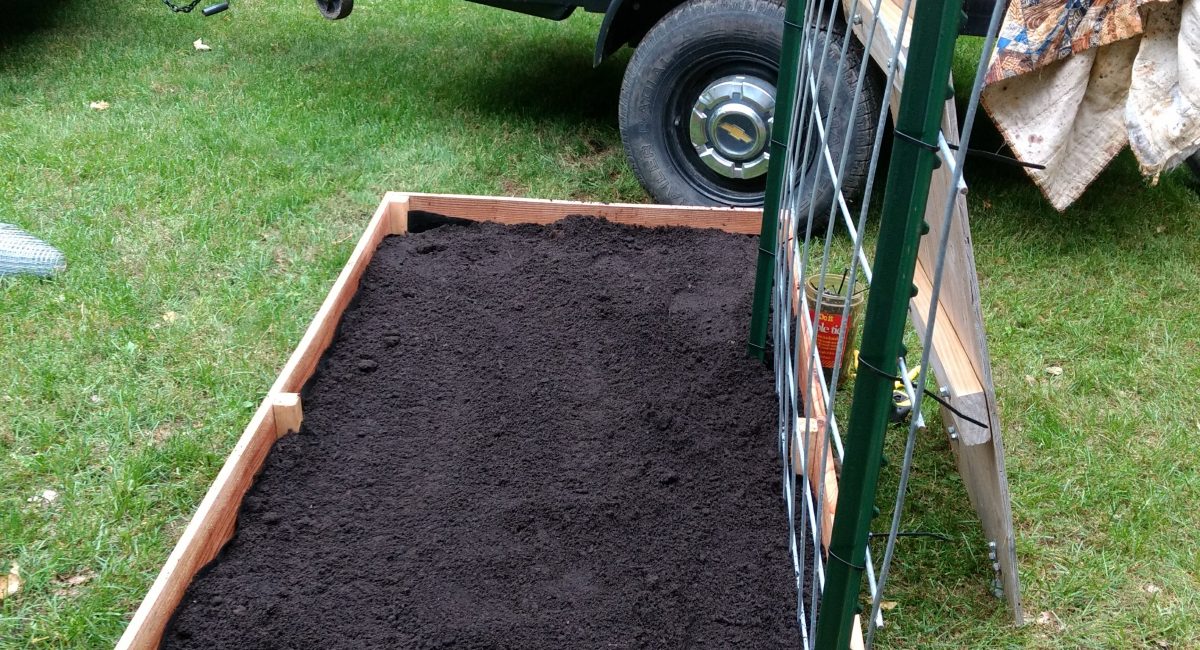
The magazine article I read used a cattle panel for the arched trellis with t-posts to secure it. New to me (being a city girl), a cattle panel is a fence designed to keep cattle in or out. I found both the cattle panel and t-posts at Tractor Supply Company (links included below). The cattle panel is solid and durable but also somewhat flexible. Perfect for an arch!
List of Materials (larger items require a truck and trailer)
-
Cattle Panels $20
1 50"x15' panel from Tractor Supply Company (TSC)
-
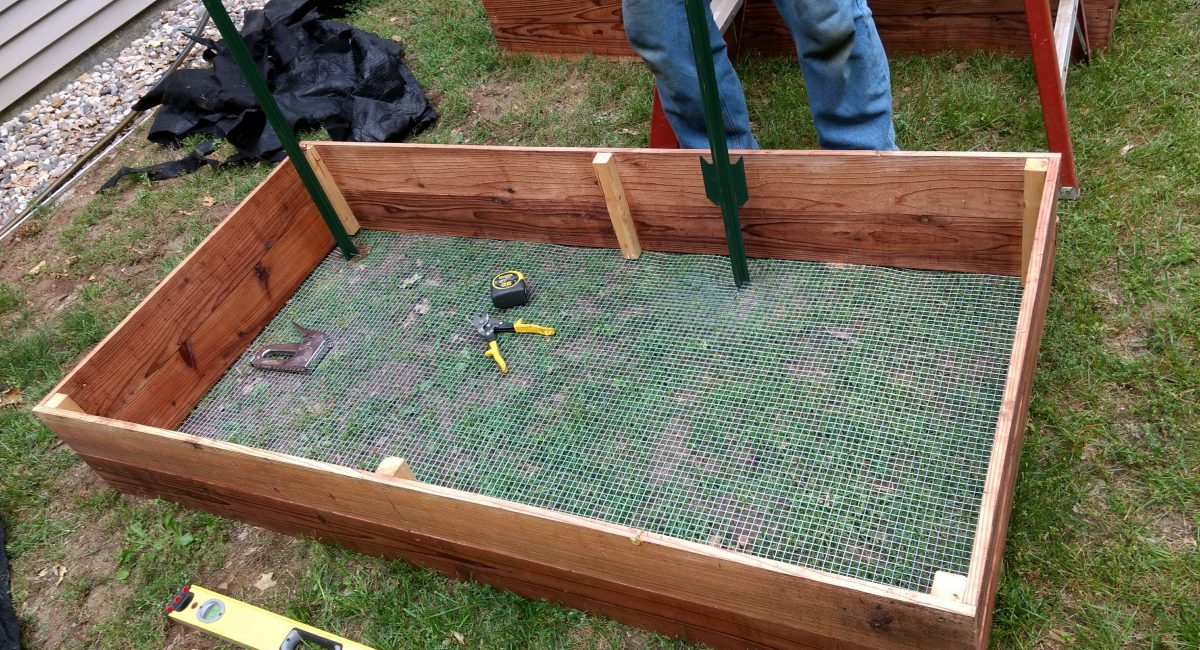
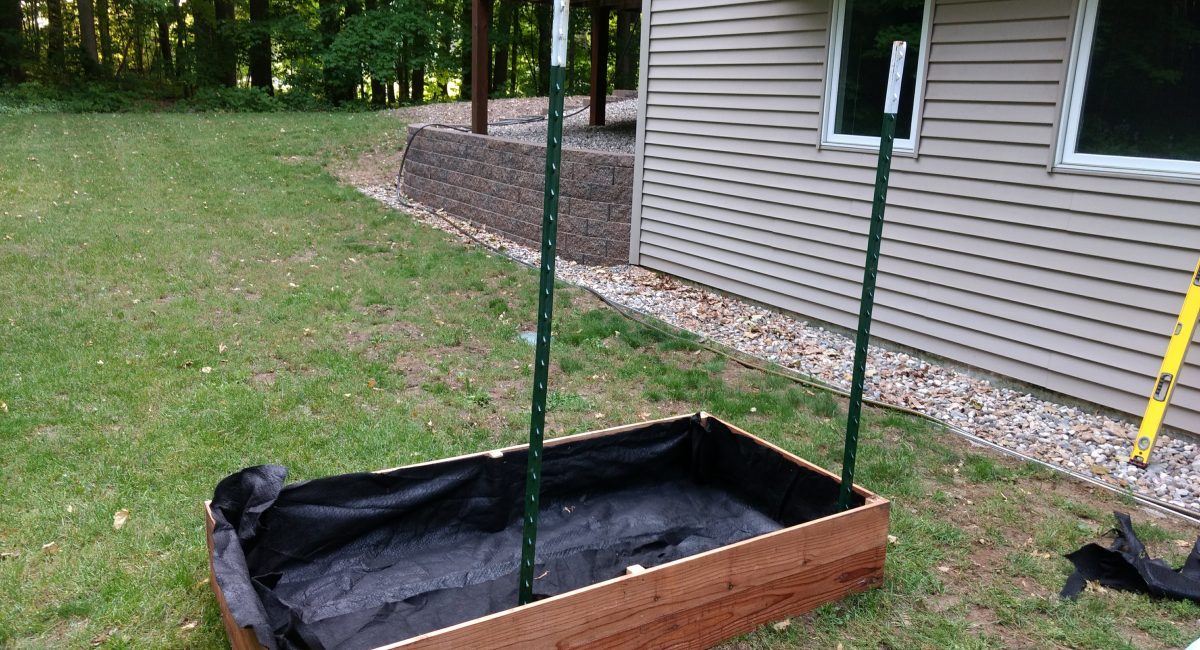
7' T-posts $19
4 total at $4.59 each from TSC. [Note: in hindsight, we didn't need the 7' tall posts. I could've easily used 5]
-
Cedar Fence Posts $27
12 8' boards at $2.25 each from Lowe's. I didn't want to spend a lot of money here so I did some more research. I came across this post that used cedar fence boards. Perfect!
-
Sealer for Cedar Boards Minimal
I chose to make a non-toxic sealer using beeswax and mineral oil (jojoba was way too expensive) based on the instructions from this post (#5). The beds were sealed a few days before it was all put together to let it soak in the wood. I doubled the recipe using 4 oz beeswax and 12 oz mineral oil which made a thick paste. This was spread on the beds with a soft cloth (2 coats). A couple of tips: I recommend beeswax pellets for easier melting and mineral oil is found in the laxative aisle. Who knew?
-
Furring Strips $4
2 8' pieces @ $2.15 each from Lowe's
-
Exterior Screws $10
1 box $9.47 from Lowe's (we didn't use very many so this cost could be considered a lot less).
-
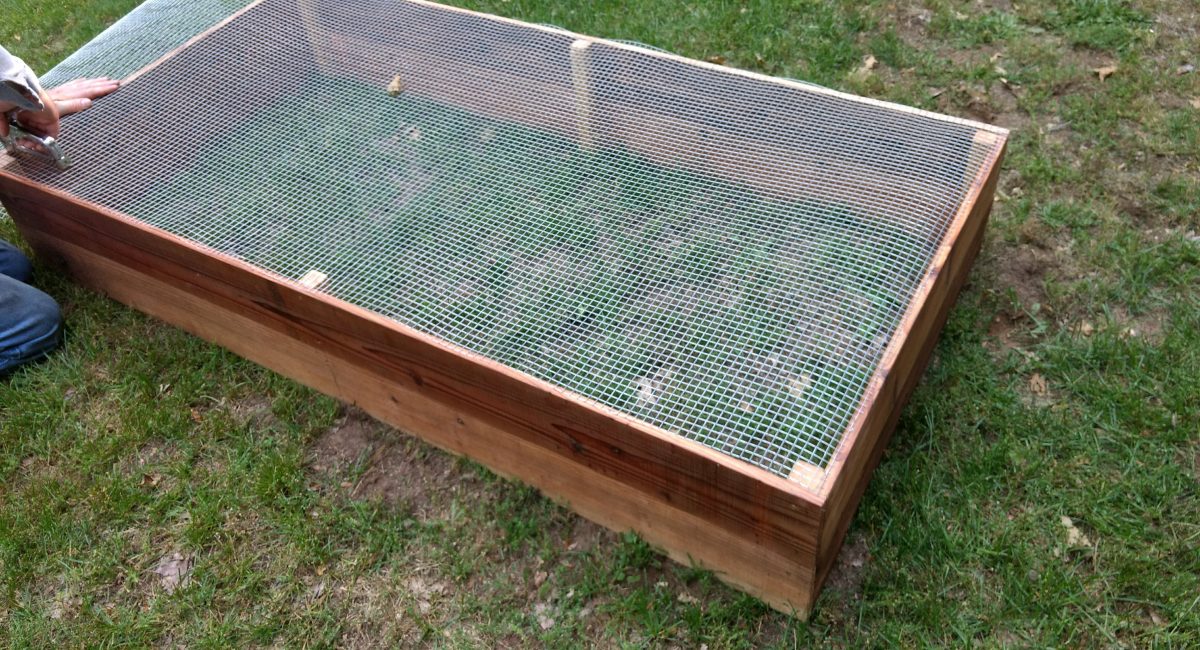
Galvanized wire (optional) $30
This was stapled to the bottom of the beds (see pictures below). We have moles/voles and this was my way of preventing them from popping up into my garden beds. I didn't use all of the wire so this cost could be considered less. Will use the rest for a future project.
-
Zip ties Minimal
We had on hand
-
Weed blocker fabric Miminal
I had thick black fabric (weedblocker) leftover from another project. This was stapled on the inner sides of the bed above the wire to hold it in place
-
Staples Minimal
Had on hand
-
Dirt $20
Top soil/compost blend locally here (Zeeland). Cost: we got the $20 minimum ($12/cubic yard) and it was enough to fill both garden beds and a good size pile leftover.
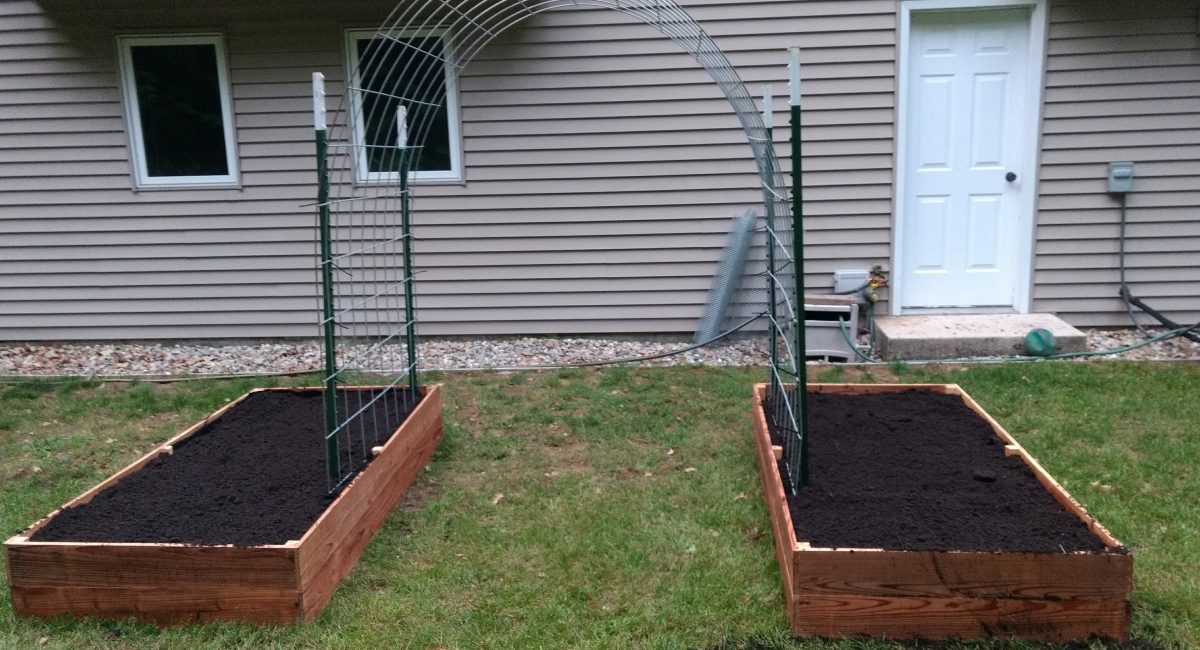
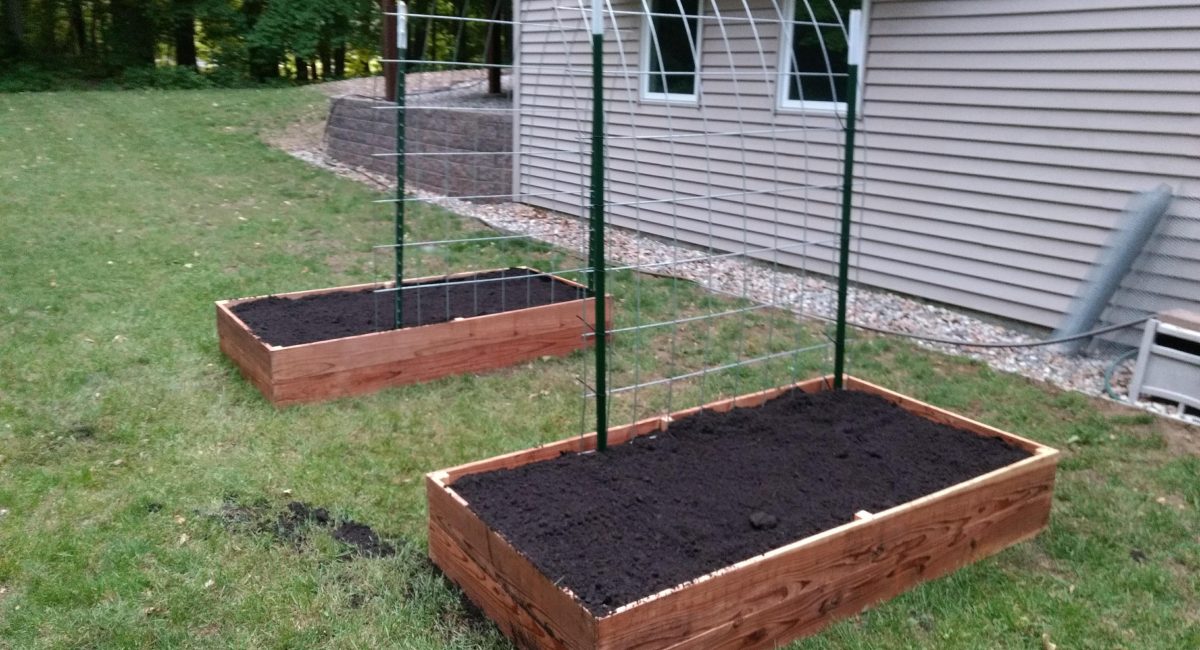
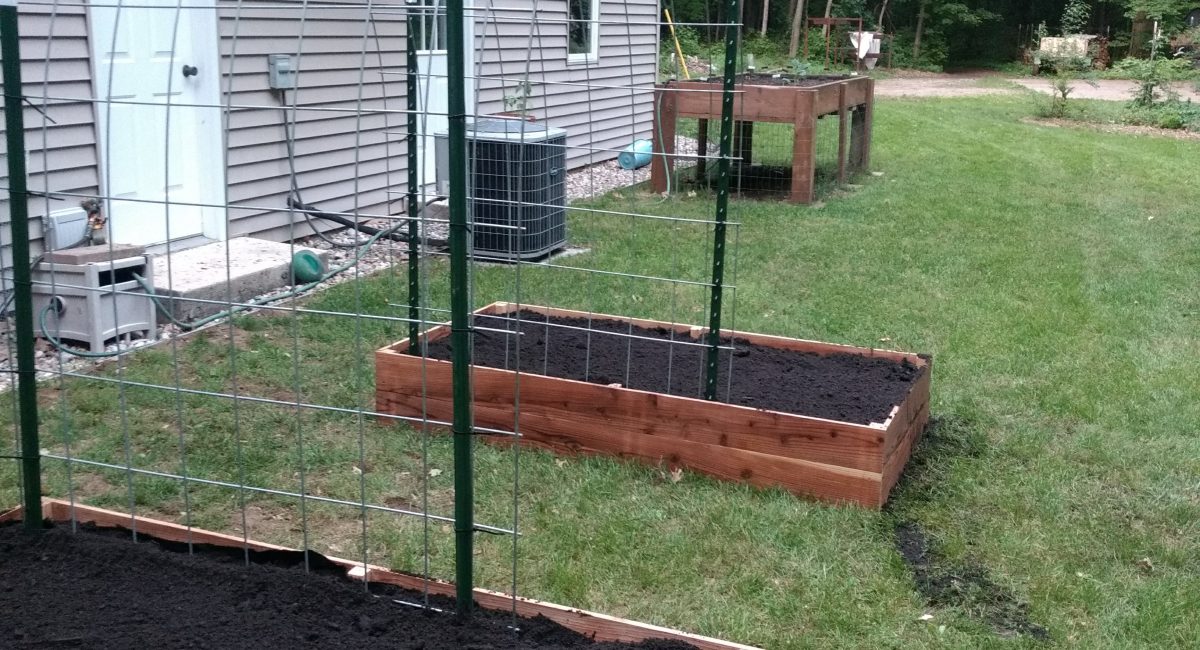
The Construction Process in Pictures
Not including the optional expense of the wire and minimal costs, the whole project cost under $100! I’m actually really excited about this, can you tell (especially based on the long length of this post)? 😉
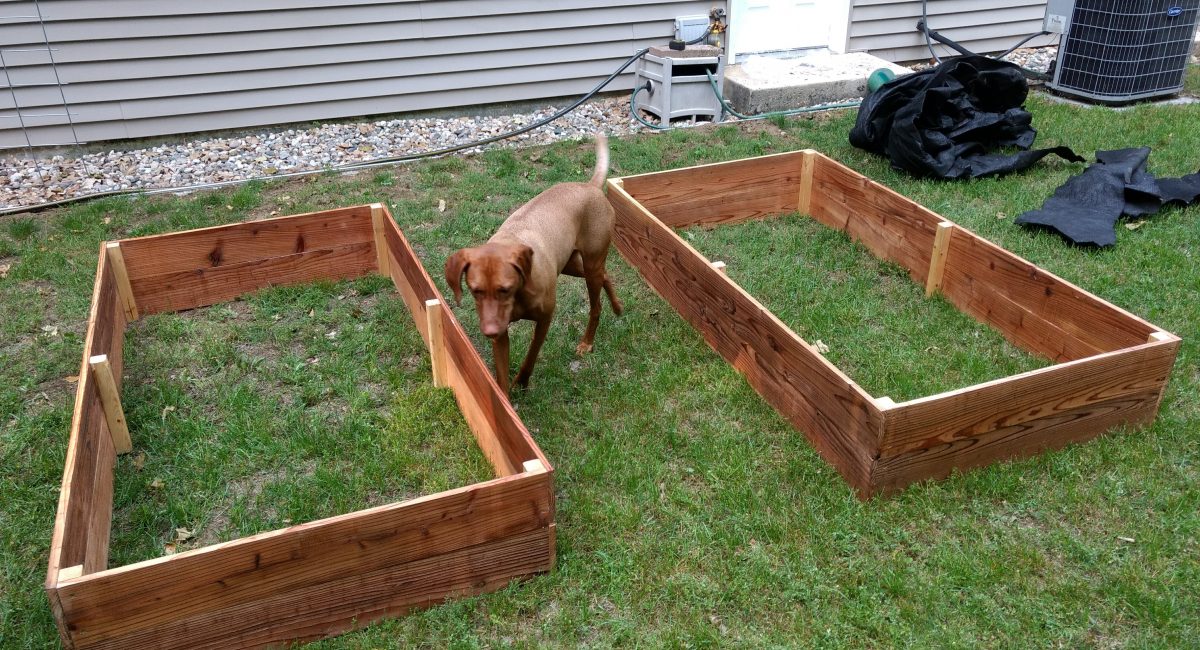
See slide show below for the progress of putting together the project (including one of my cute dog “helping”) . Where the slideshow starts is the picture of just one of the garden beds in the grass.
The garden beds were already put together on a different day and I didn’t think to take pictures. The basic instructions are in the link above so I didn’t write them out again. I didn’t take a picture of every single step because we were trying to get done before the mosquitoes got us. If you have questions about the process, please let me know!

What plants are you growing this year? Please comment below. Thank you for reading!
So whether you eat or drink or whatever you do, do it all for the glory of God.” 1 Corinthians 10:31 (NIV)